Building and Pushing Docker Images to AWS ECR for Seamless Deployment
Streamline Your Containerized Deployments with AWS ECR


Introduction
In the world of containerization, Docker has emerged as a popular choice for packaging applications into lightweight, portable, and self-contained units. Once you've created your Docker image, the next step is to efficiently deploy it to your desired environment. AWS Elastic Container Registry (ECR) simplifies the process by providing a managed container registry service that seamlessly integrates with other AWS services. In this section, we'll explore the steps to build and push Docker images to AWS ECR for a seamless deployment experience.
Setting Up the Development Environment
Before we dive into building and pushing Docker images to AWS ECR, let's ensure our development environment is properly set up. Install Docker on your local machine and make sure you have the necessary AWS credentials and access to an AWS account with ECR enabled.


Writing a Dockerfile
A Dockerfile is a text file that contains instructions on how to build a Docker image. We'll start by creating a Dockerfile that specifies the dependencies, environment variables, and commands required to run our application.
# Layer 1: Telling Docker to use the node:14 image as the base image for the container.
FROM node:14

# Layer 2: Telling Docker to create a directory called `app` in the container and set it as the working directory.
WORKDIR /app

# Layer 3: Copying the package.json file from the root of the project to the `app` directory in the container.
COPY package.json .

# Layer 4: Installing the dependencies listed in the package.json file.
RUN npm install

# Layer 5: Copying all the files from the root of the project to the `app` directory in the container.
COPY . .

# Layer 6: Telling Docker that the container will listen on port 3000.
EXPOSE 3000

# Layer 7: Telling Docker to run the `npm start` command when the container is started.
CMD ["npm", "start"]
Building the Docker Image
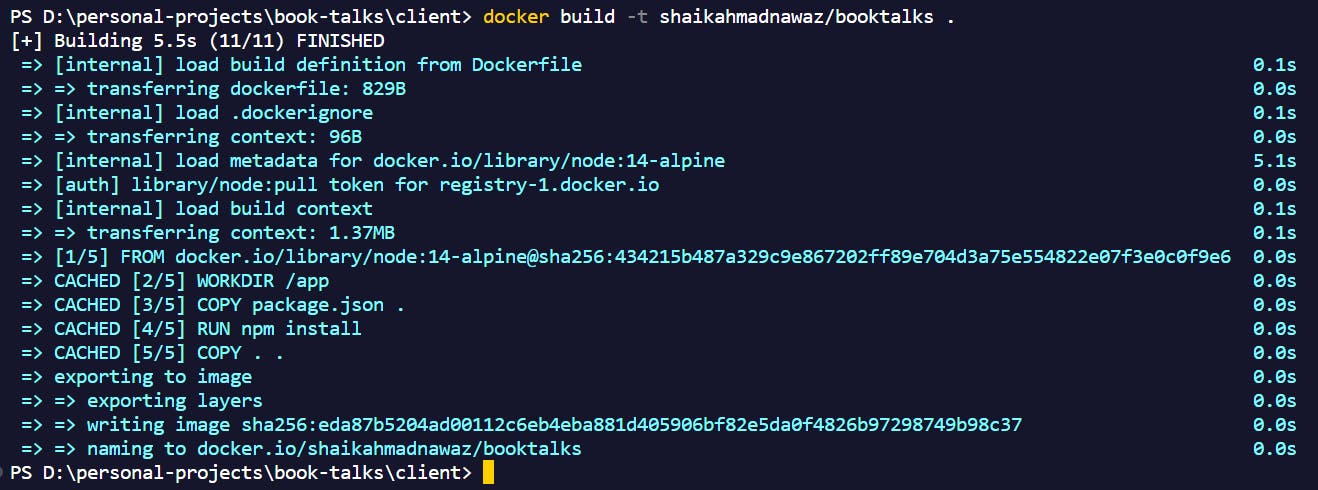
When building a Docker image, the docker build command is used, and it allows us to specify various parameters. One important parameter is -t, which is used to give the image a name tag for easy reference and access.
The naming convention for Docker images is not standardized, but it is common to use the following format: Docker username, followed by a slash /, and then the version number separated by a colon :.
To build a Docker image with the desired name tag, use the following command:
docker build -t <username/application> .
For example, shaikahmadnawaz/booktalks.
The . represents the second argument, which signifies the location of the Dockerfile. In this case, since the Dockerfile is in the current directory, a period . is used.
By specifying the name tag during the build process, you can easily identify and reference the image later on, making it more convenient for deployment and management.
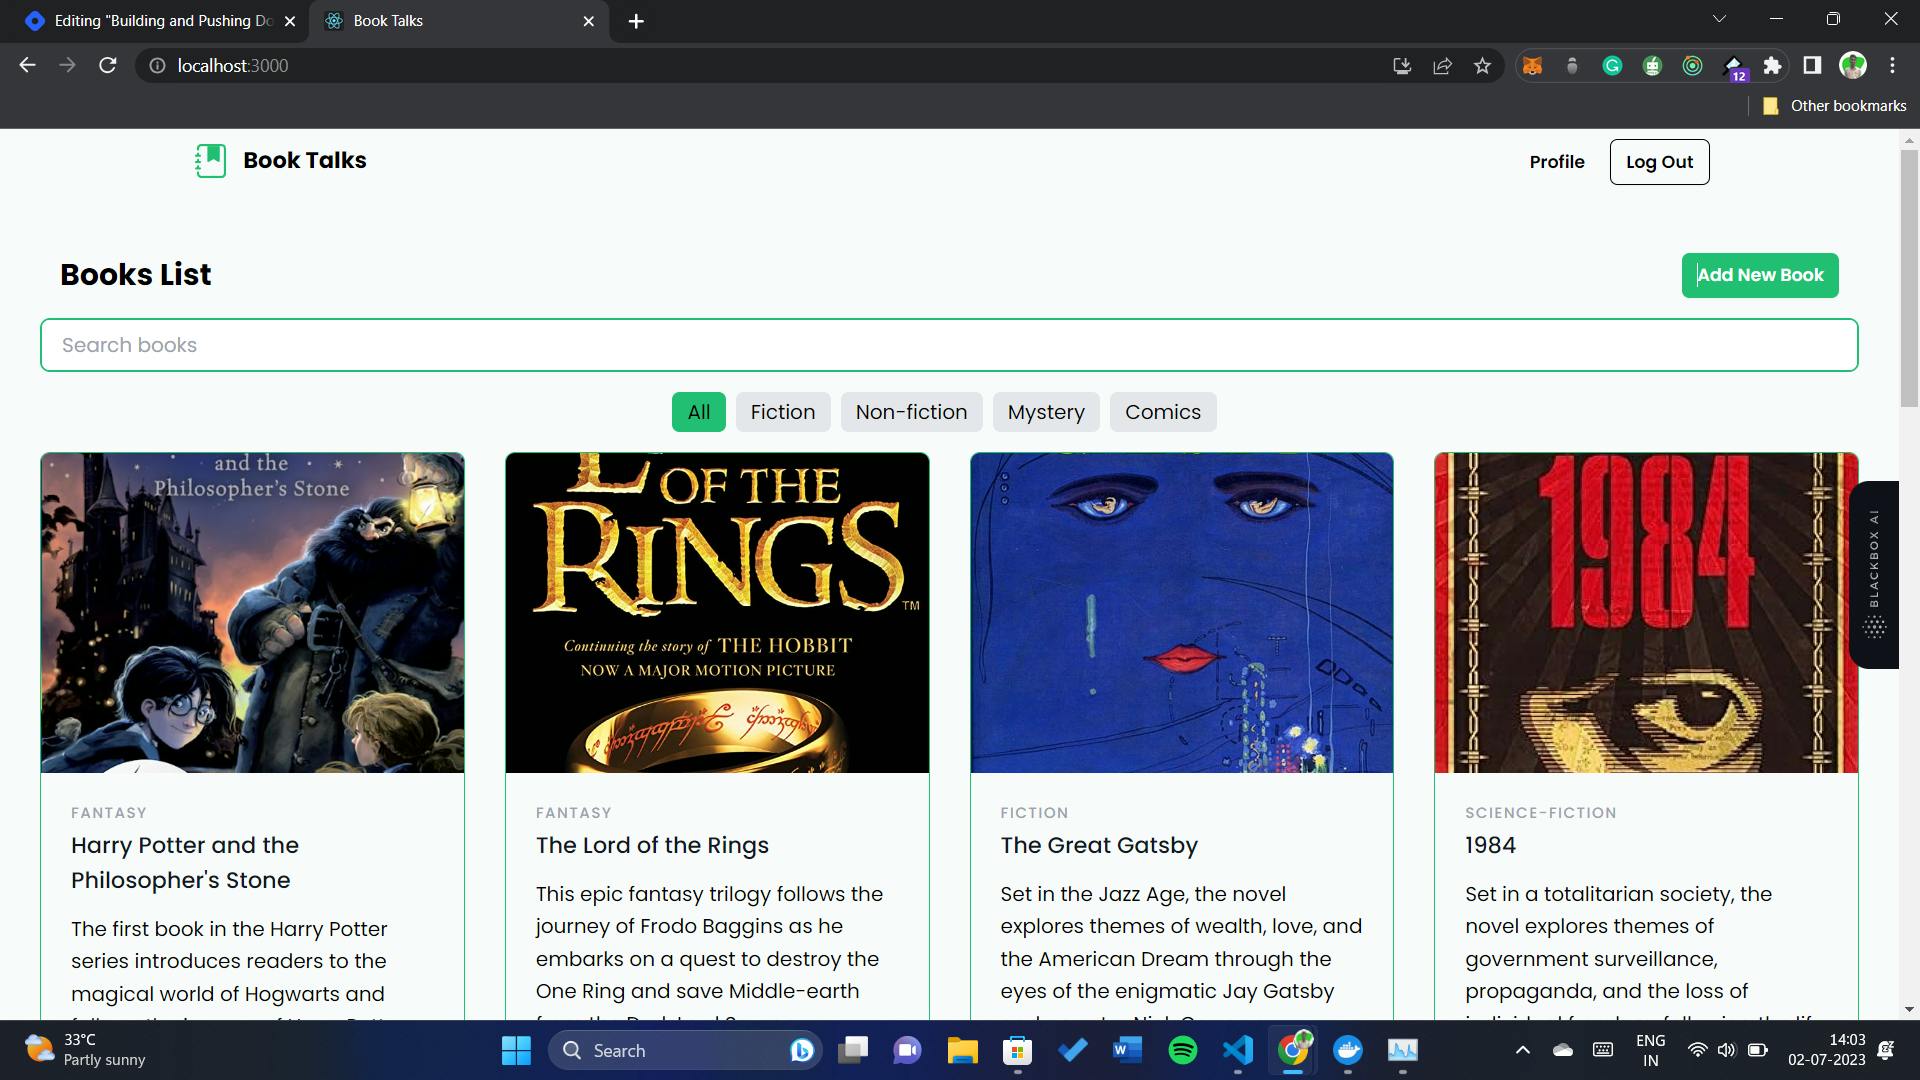
To run the Docker image locally, you can use the docker run command along with the -p flag to map the container's port to the host's port. Here's the command:
docker run -p 3000:3000 <username/application>
Replace <username/application> with the actual name tag of your Docker image.
Once the container is running, you can access your application by visiting http://localhost:3000 in your browser. Congratulations, you have successfully created a Docker container and are now running it on your local machine!
However, in real-world scenarios, it's common to push the Docker image to a container registry for better management and deployment. Popular options include Docker Hub or various cloud-based container registries. In this case, we'll use Amazon Elastic Container Registry (ECR) provided by AWS.
Authenticating and Pushing to AWS ECR
Before we can push the Docker image to AWS ECR, we need to authenticate ourselves. We'll cover the various authentication methods, such as using AWS CLI, Docker CLI, or IAM role-based authentication. Once authenticated, we'll use the docker push command to push the Docker image to our ECR repository.
Ensure you have the necessary AWS CLI installed and configured on your local machine. You can refer to the AWS CLI documentation for instructions on installation and configuration.

Create a Repo in ECR
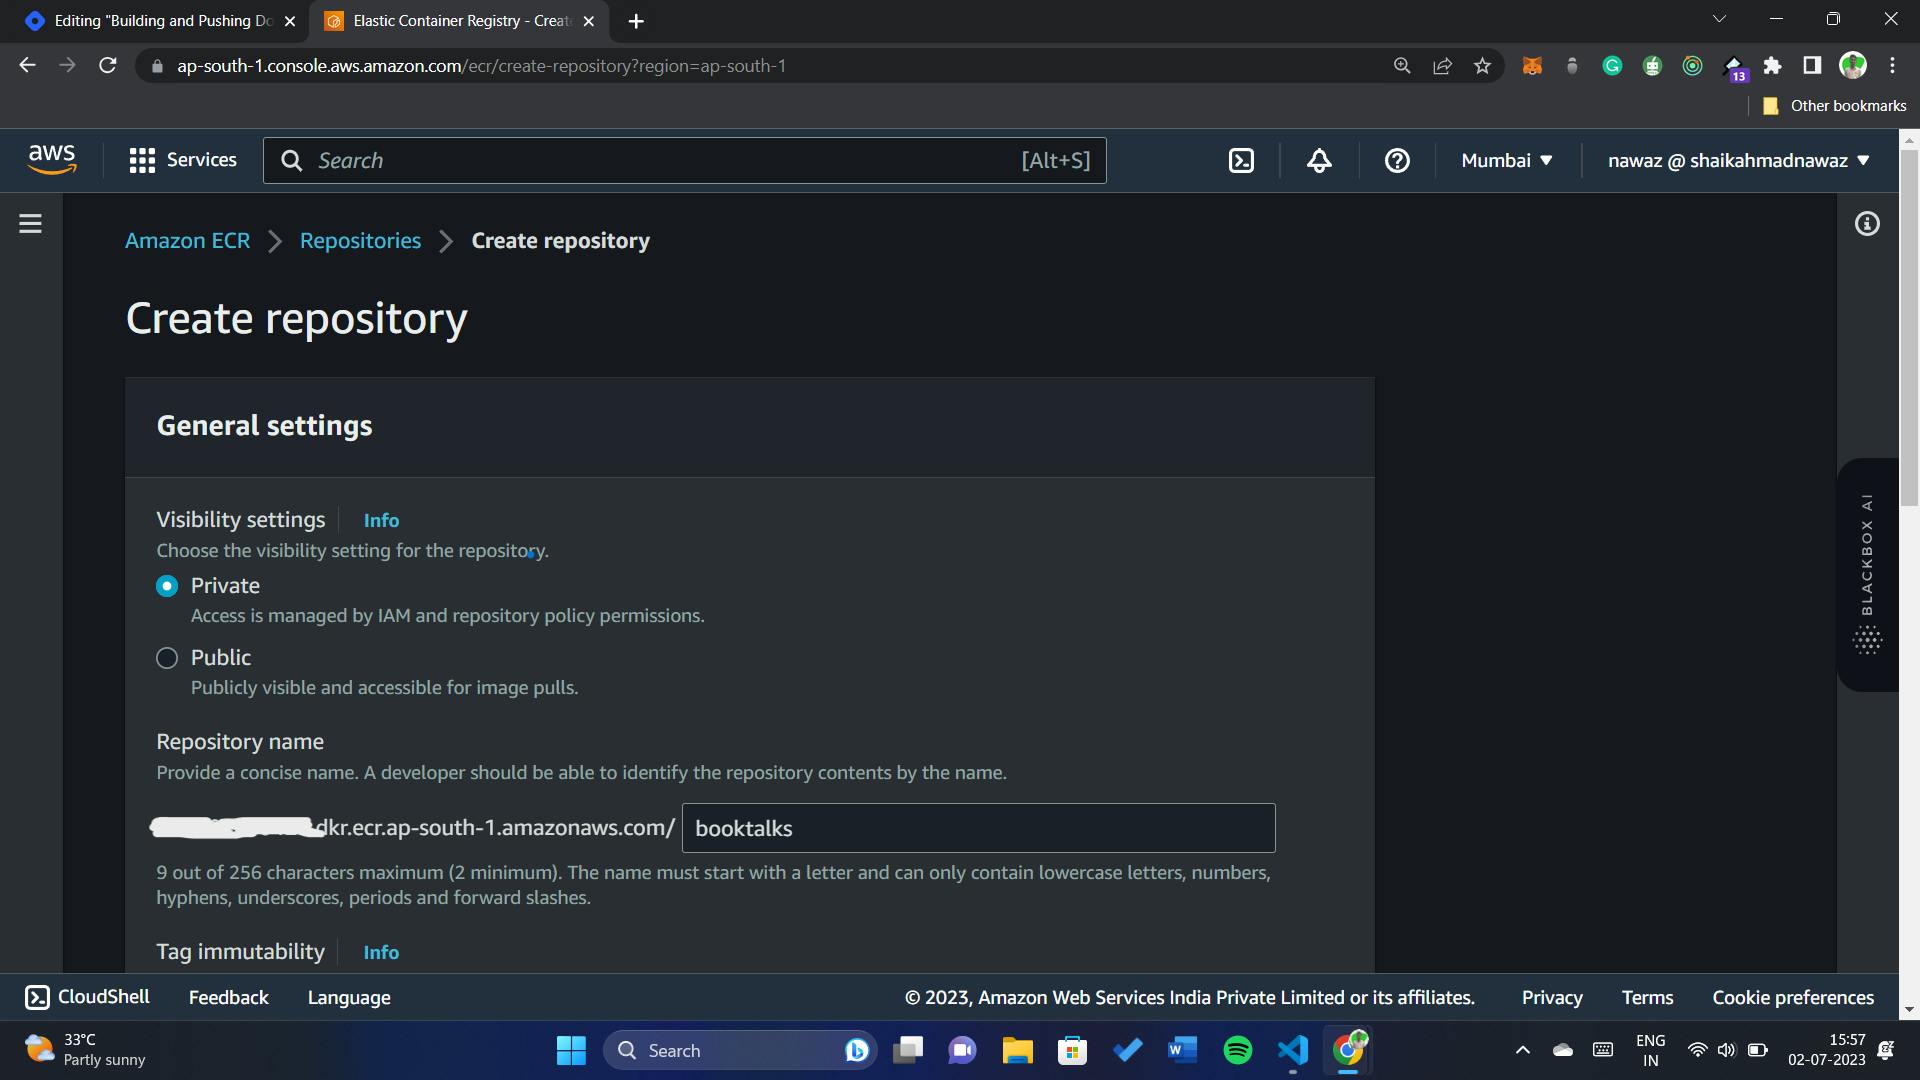
Open a terminal or command prompt and authenticate your Docker client with the ECR registry by running the following command:
aws ecr get-login-password --region <region> | docker login --username AWS --password-stdin <account-id>.dkr.ecr.<region>.amazonaws.comReplace
<region>with the AWS region where your ECR repository is located, and<account-id>with your AWS account ID. This command retrieves an authentication token and uses it to log in to the ECR registry.Tag your Docker image with the ECR repository URI. Run the following command:
docker tag <local-image> <repository-uri>Replace
<local-image>with the name of your local Docker image, and<repository-uri>with the URI of your ECR repository. The repository URI follows the pattern<account-id>.dkr.ecr.<region>.amazonaws.com/<repository-name>. Ensure the repository name matches the ECR repository you want to push the image to.Run the following command to push this image to your newly created AWS repository:
docker push <repository-uri>Hurray! We have made it 🎉
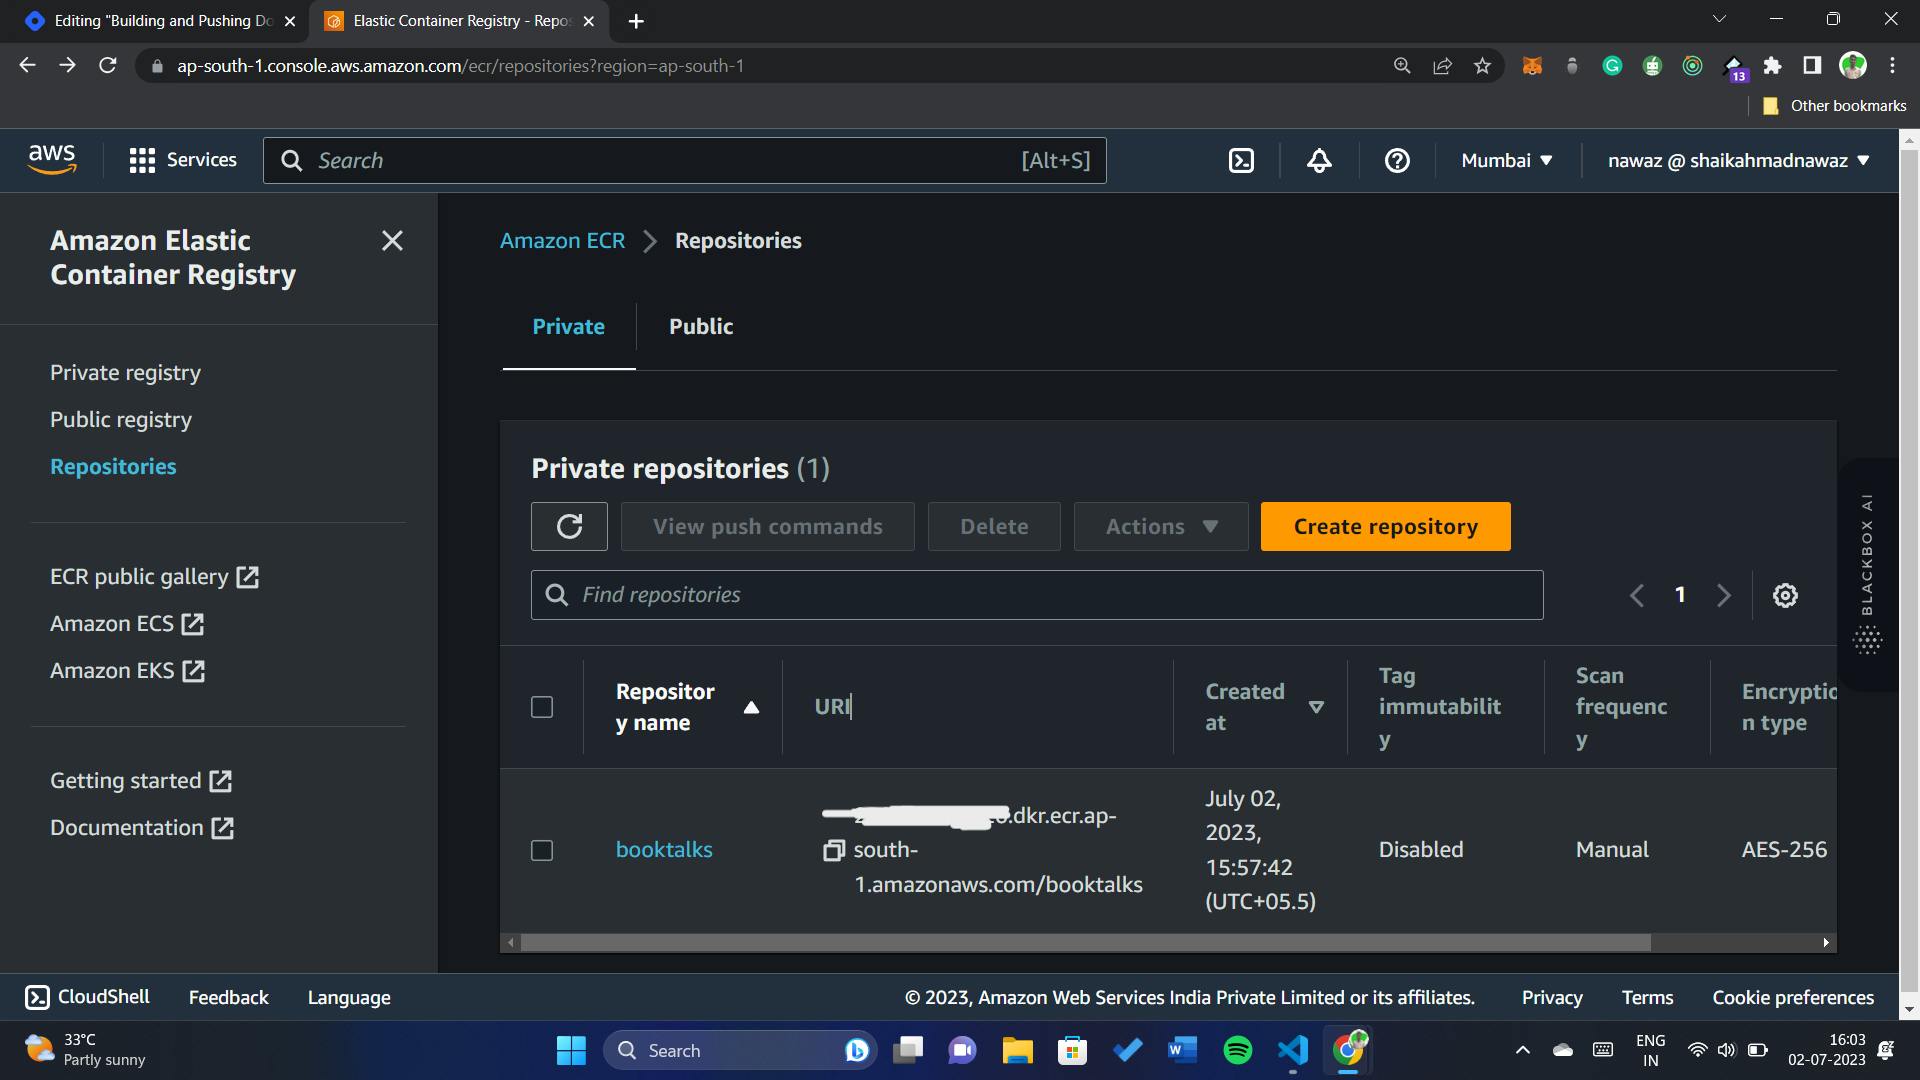
After successfully pushing your Docker image to AWS ECR, you can easily view and manage it through the AWS Management Console. Follow these steps:
Go to the AWS Management Console and navigate to the Amazon Elastic Container Service (ECS) page.
In the ECS dashboard, select "Amazon Elastic Container Registry" from the sidebar menu.
You will see a list of your ECR repositories. Locate and click on the repository that you uploaded the image to earlier.
Inside the repository, you will find details about the uploaded Docker image, including its tags, size, and timestamp. You can also view the image's metadata and any associated vulnerability scan results.
If you need to use the image further, you can copy its Image URI from the ECR repository. The Image URI follows the format
<account-id>.dkr.ecr.<region>.amazonaws.com/<repository-name>:<image-tag>. This URI can be used in various deployment scenarios, such as AWS Elastic Beanstalk, Amazon ECS, or Kubernetes.
By accessing the AWS Management Console, you can conveniently monitor and manage your Docker images within AWS ECR. Remember to take note of the Image URI if you plan to use the image in other AWS services or deployments.

By following these steps, you can authenticate your Docker client with AWS ECR and securely push your Docker image to the repository for seamless deployment in an AWS environment.
Remember to ensure that you have the necessary IAM permissions to interact with ECR and push images to the desired repository.
Pulling from AWS ECR
You can pull the Docker image from the ECR repository using the following command:
docker pull <repository-uri>
Replace <repository-uri> with the URI of your ECR repository. The repository URI follows the format <account-id>.dkr.ecr.<region>.amazonaws.com/<repository-name>. Make sure to provide the correct repository name.
To verify that the image has been successfully pulled, you can run the docker images command, which lists all the images available on your local machine.
Conclusion
Building and pushing Docker images to AWS ECR is a crucial step in the containerization workflow. By following the steps outlined in this guide, you can ensure a seamless deployment experience and leverage the benefits of AWS ECR's managed container registry service. Whether you're deploying to production environments or iterating on your development workflow, AWS ECR provides a reliable and scalable solution. Start optimizing your container deployments today with AWS ECR!
And don't forget to connect with us on social media to stay updated with the latest tips, tutorials, and guides:
Connect with me on LinkedIn: shaikahmadnawaz
Follow me on Twitter: shaikahmadnawaz
I also encourage you to check out my GitHub repositories for more code samples and projects:
- Explore my GitHub: shaikahmadnawaz