Building AWS Infrastructure with Terraform: A Beginner's Journey
Unlock the power of Infrastructure as Code with Terraform: A beginner's exploration into building and managing AWS infrastructure


Welcome to the beginner's guide on using Terraform to build AWS infrastructure. In this blog, we will embark on a journey to explore the powerful combination of Terraform and AWS, enabling you to automate and manage your infrastructure as code.
Introduction
Infrastructure as Code (IaC) is a practice that allows developers and operations teams to define and provision infrastructure using code. Terraform, an open-source tool created by HashiCorp, is a popular choice for implementing IaC. It offers a declarative approach to infrastructure provisioning and allows you to define and manage resources in a variety of cloud providers, including Amazon Web Services (AWS).
Prerequisites
Before we dive into Terraform and AWS, there are a few prerequisites you'll need to set up:
AWS Account: If you don't have an AWS account already, sign up for one at https://aws.amazon.com. This will provide you with the necessary credentials to interact with AWS services.
Terraform Installation: Install Terraform on your local machine. You can download the latest version from the official Terraform website (https://developer.hashicorp.com/terraform/downloads) and follow the installation instructions for your operating system.
Once you have these prerequisites in place, we can move on to the basics of Terraform and AWS.
Terraform Basics
Terraform operates on the concept of "providers" that define the available infrastructure platforms. In our case, the AWS provider allows us to interact with AWS services. Terraform resources represent the components you want to provision, such as EC2 instances, S3 buckets, and VPCs.
To get started, create a new directory for your Terraform project. Inside this directory, create a new file named main.tf and open it in your preferred text editor.
In main.tf, define the AWS provider block:
provider "aws" {
  region = "ap-south-1"   # Replace with your desired AWS region
}
Here, we specify the AWS region where we want to provision our resources. Modify the region parameter to match your desired region.
Defining AWS Resources
Let's start by creating an EC2 instance in AWS using Terraform. Add the following resource block to main.tf:
resource "aws_instance" "app_server" {
  ami           = "ami-0f5ee92e2d63afc18"   # Replace with your desired AMI ID
  instance_type = "t2.micro"

  tags = {
      Name = "AppServerInstance"
  }
}
In this example, we define an EC2 instance resource named "app_server." We specify the Amazon Machine Image (AMI) ID and the instance type.
main.tf
terraform {
  required_providers {
    aws = {
      source  = "hashicorp/aws"
      version = "~> 4.16"
    }
  }

  required_version = ">= 1.2.0"
}

provider "aws" {
  region = "ap-south-1"   # Replace with your desired AWS region
}

resource "aws_instance" "app_server" {
  ami           = "ami-0f5ee92e2d63afc18"   # Replace with your desired AMI ID
  instance_type = "t2.micro"

  tags = {
      Name = "AppServerInstance"
  }
}
To initialize the Terraform project, open your terminal, navigate to the project directory, and run the following command:
terraform init
This command downloads the necessary provider plugins and sets up the project for use.
Deploying Infrastructure
Once the project is initialized, run the following command to preview the changes Terraform will make:
terraform plan
The plan command provides an overview of the changes Terraform will apply to your infrastructure. Review the output and ensure it aligns with your expectations.
To apply the changes and provision the EC2 instance, execute the following command:
terraform apply
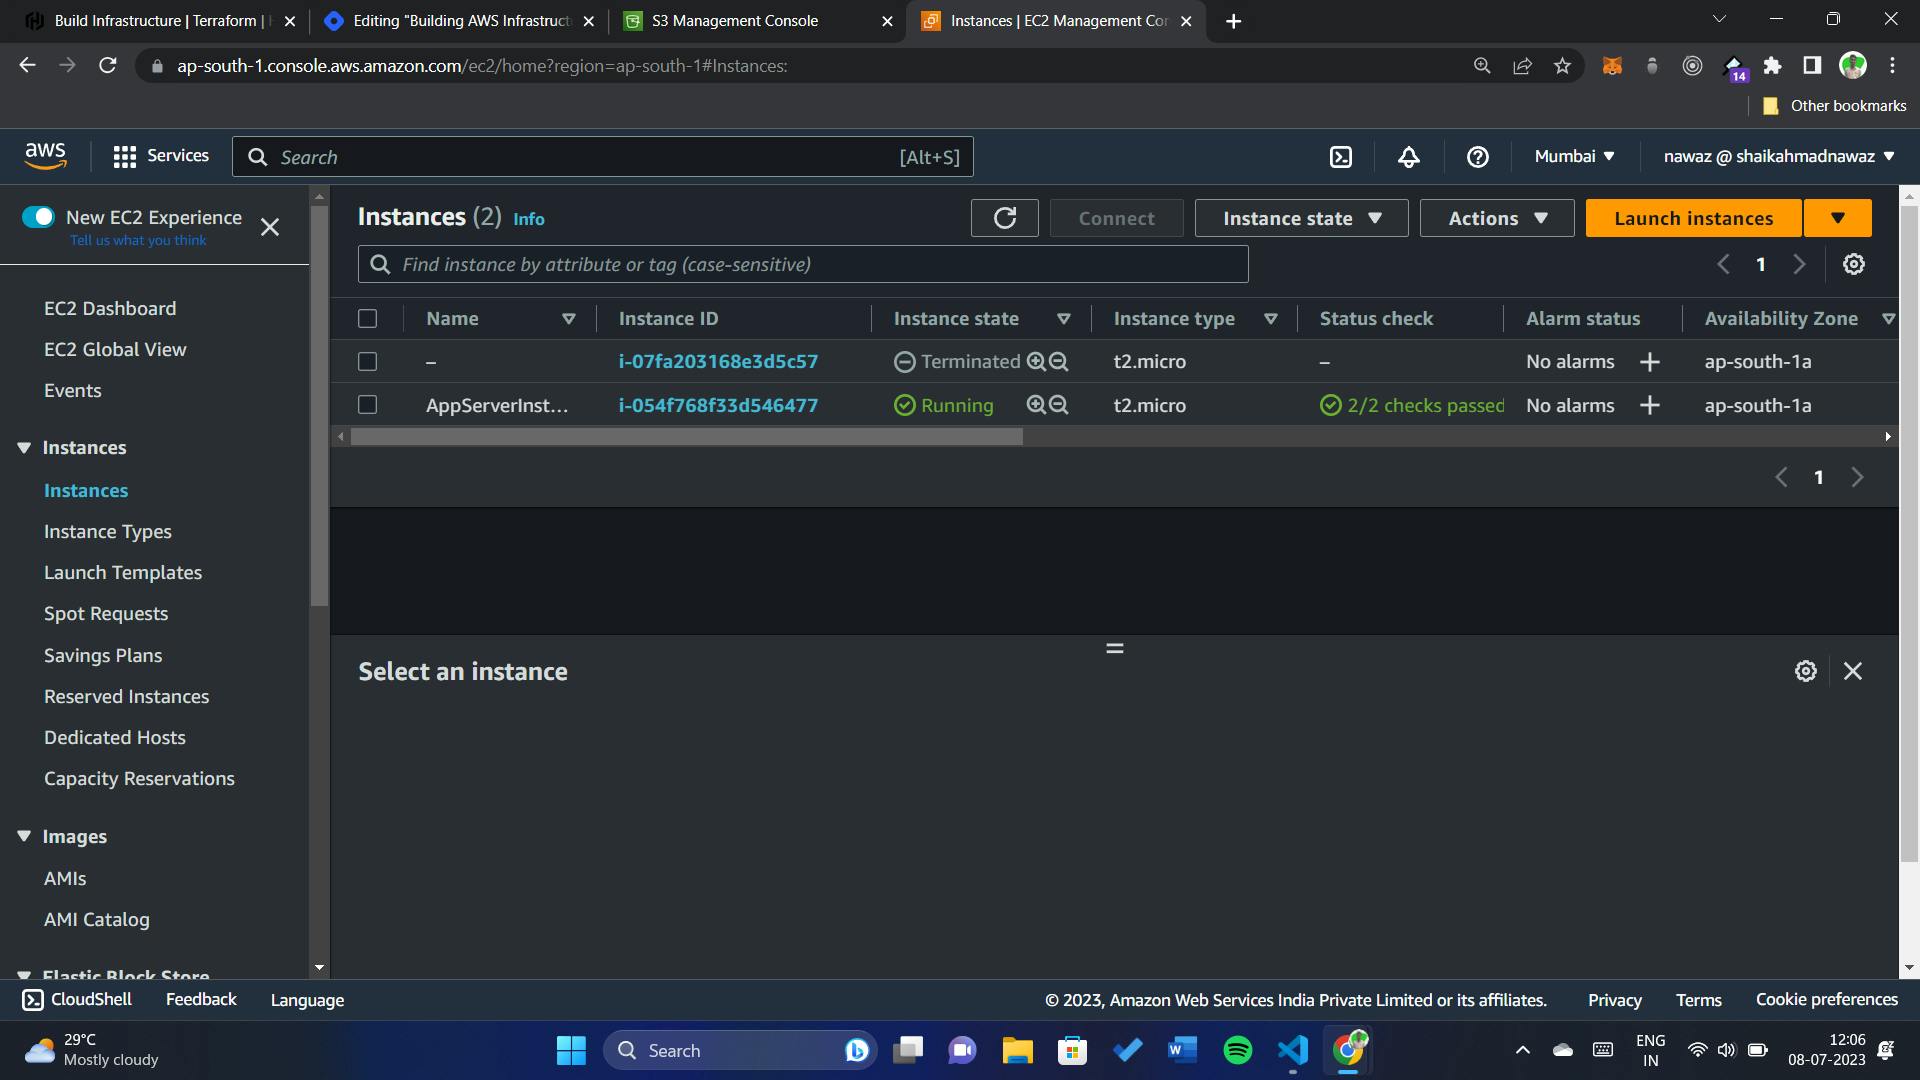
Terraform will prompt for confirmation. Enter "yes" to proceed with the deployment. You will see the progress of the deployment, and once completed, you'll have an EC2 instance running in your AWS account.
Managing Infrastructure State
Terraform uses a state file to track the current state of your infrastructure. By default, this file is stored locally. However, for better collaboration and to ensure the state is accessible by the entire team, it's recommended to use remote state storage.
AWS provides a service called Amazon S3 that can be used to store your Terraform state file. Create an S3 bucket in your AWS account and configure Terraform to use it for state storage. Add the following block to main.tf:
terraform {
  backend "s3" {
    bucket = "my-terraform-bucket-blog"   # Replace with your S3 bucket name
    key    = "terraform.tfstate"
    region = "ap-south-1"          # Replace with your desired AWS region
  }
}
Remember to replace "my-terraform-bucket-blog" with the name of your S3 bucket.
This is the final main.tf:
terraform {
  backend "s3" {
    bucket = "my-terraform-bucket-blog"   # Replace with your S3 bucket name
    key    = "terraform.tfstate"
    region = "ap-south-1"          # Replace with your desired AWS region
  }

  required_providers {
    aws = {
      source  = "hashicorp/aws"
      version = "~> 4.16"
    }
  }

  required_version = ">= 1.2.0"
}

provider "aws" {
  region = "ap-south-1"   # Replace with your desired AWS region
}

resource "aws_instance" "app_server" {
  ami           = "ami-0f5ee92e2d63afc18"   # Replace with your desired AMI ID
  instance_type = "t2.micro"

  tags = {
    Name = "AppServerInstance"
  }
}
Destroying Resources
In addition to provisioning and updating infrastructure, Terraform also provides a straightforward way to destroy resources when they are no longer needed. This ensures that you only pay for the resources you actually require.
To destroy the resources created by Terraform, open your terminal, navigate to the project directory, and run the following command:
terraform destroy
Terraform will generate a plan that outlines the resources to be destroyed. Review the plan carefully, as the destroy operation is irreversible.
If the plan looks correct, Terraform will prompt for confirmation. Enter "yes" to proceed with the destruction of the resources. Terraform will then tear down the infrastructure provisioned earlier, including the EC2 instance in our example.
It's important to exercise caution when using the destroy command, as it permanently removes resources from your AWS account. Ensure that you have a backup or a way to restore any critical data before proceeding.

By leveraging the power of Terraform, you can easily manage the lifecycle of your AWS infrastructure, including creation, modification, and destruction of resources, all in a controlled and automated manner.
Conclusion
Congratulations on completing your beginner's journey to building AWS infrastructure with Terraform! In this blog, we covered the basics of Terraform, setting up the AWS provider, defining resources, deploying infrastructure, and managing state. We also explored how to destroy resources when they are no longer needed.
By using Terraform, you now have a powerful tool in your arsenal for automating and managing your AWS infrastructure as code. Remember to follow best practices, keep your code modular and reusable, and continue exploring the advanced features and functionalities offered by Terraform and AWS.
Happy building and destroying infrastructure with Terraform and AWS!
For a detailed reference and access to the complete code implementation, you can visit my GitHub repository. The repository contains the backend and frontend code, along with instructions on setting up the project and running it locally.
And don't forget to connect with me on social media to stay updated with the latest tips, tutorials, and guides:
Connect with me on LinkedIn: shaikahmadnawaz
Follow me on Twitter: shaikahmadnawaz
I also encourage you to check out our GitHub repository for more code samples and projects:
- Explore my GitHub: shaikahmadnawaz